Showing posts with label patternmaking. Show all posts

Friday, February 7, 2014

Design Notebook: Tailored Jacket Patternmaking

tailoredjacket tailoredjacket3tailoredjacket4 tailoredjacket2

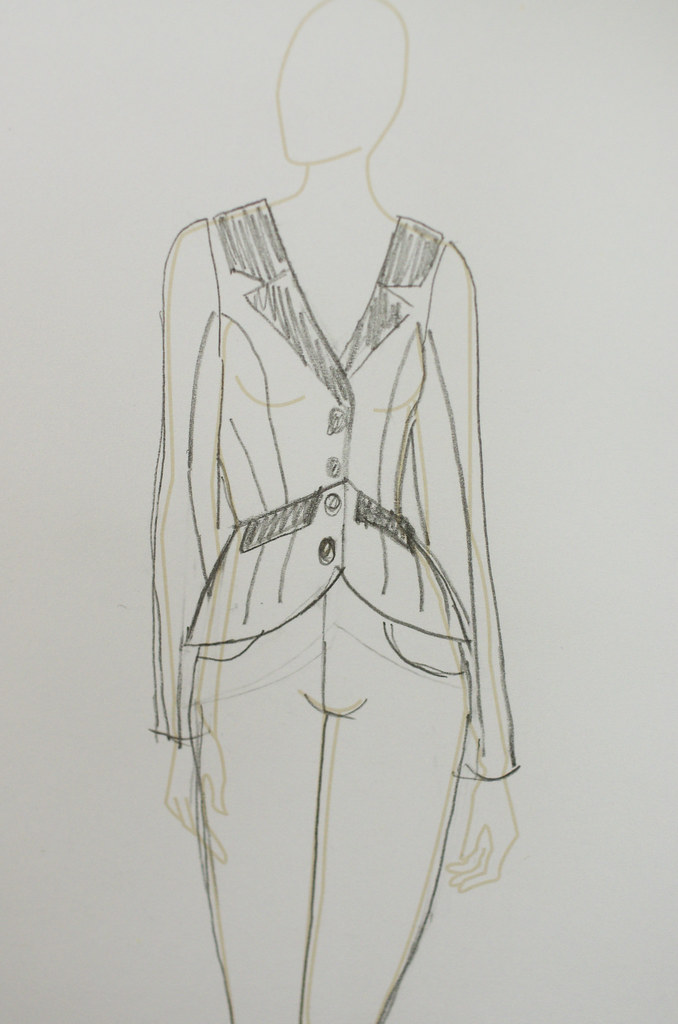
This week - after getting my Line & Proportion notebook signed off (yay!) - I started working on my Tailored Jacket for school.  It's one of the big things I need to finish before I can start on my Ball Gown, and it has to meet certain criteria to be approved; specifically, it has to have shoulder pads, a full lining, a two-piece sleeve, a tailored pocket, a mitered cuff, and a notched collar.

I designed a boring jacket that fit the requirements back when I first started at school, but late this last year, I came upon a photo of a beautiful two-tone Balenciaga suit from 1947 and was instantly inspired to design a new one. I wanted to retain the iconic New Look wasp waist with exaggerated hips, but make it contemporary enough to wear with skinny jeans and pencil skirts alike. Plus, I had to put on a bow on it, 'cause it was kinda Balenciaga's thing.

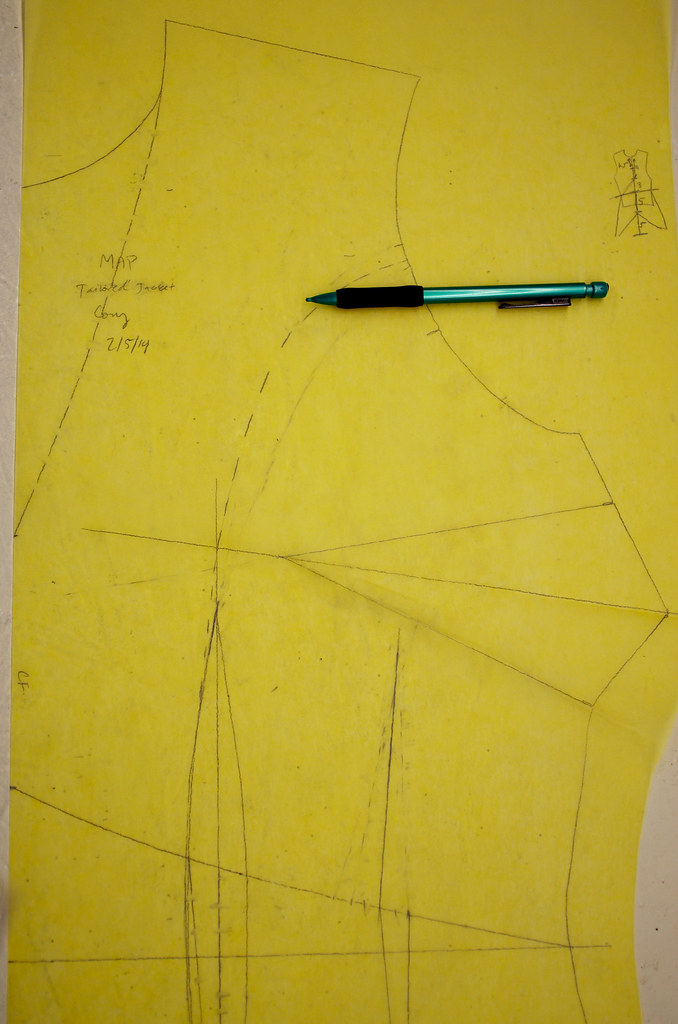
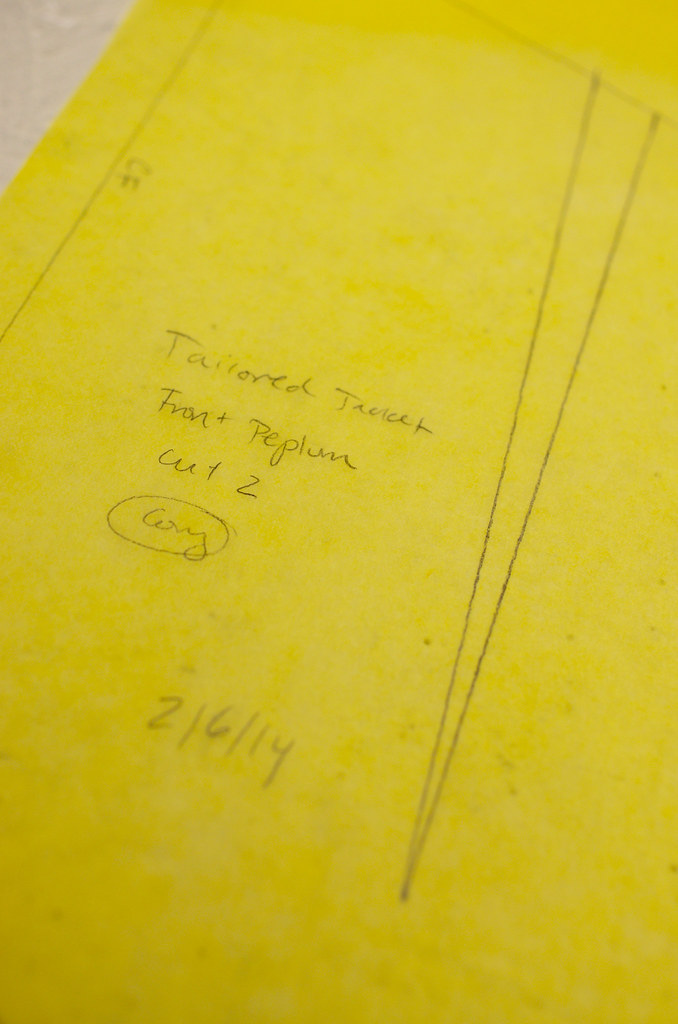
I started with my jacket sloper for the basic fit, and popped the bust dart into the princess seam.  I know from previous experience that for a good fit between my waist and bust, I need small darts at the side fronts, so I incorporated these lines into the design. The back has pleats that add a little extra fullness, which, combined with the bow, keeps the back from becoming a total snooze-fest.  I already have my fabrics picked out, and I'm going to start hunting for the perfect pink lining and vintage black glass buttons so I'll have everything ready to start construction by early April.

Happy Friday!

Wednesday, October 23, 2013

Patternmaking: Basic Tee, Part II

IMGP0132 IMGP0134IMGP0147 IMGP0141

I spent this morning working on a muslin of my basic tee pattern out of a scrap of jersey I had left over from the show.  I've already tweaked the fit a bit by grading the bottom out 3/8", and haven't decided yet what I'm going to do about the fold of extra fabric in the lower back.  I have a feeling that if I slashed and spread up the center back, it would help, since it looks like the pattern is the right width at my waistline, but is bunching up because there's not enough width to cover my butt.  (For lack of better phrasing.)  I've definitely noticed that this jersey has much less horizontal stretchiness than the other fabrics I'm planning to use, so the fit will change as I start to use them.  I'm going for negative ease in the bust, just a touch of positive ease in the waist, and a lovely hip-skimming amount of positive ease in the hip, which will be greatly affected by the stretchiness and bounce-back of the fabric, so I'll just have to wait until I'm working in the final fabric to see how this pattern drapes and fits.

IMGP0119 IMGP0145

It's funny that my initial thought was that the body would be the easy part, and the sleeves would give me problems, because: holy range of motion, Batman!  I'm pretty impressed by the fit on this sleeve on the first try.  After copying the sleeve pattern, I changed the shape of the sleeve cap and added an extra 1/8" on each side of the underarm so that it would fit the armhole without any ease.  There's definitely bunching in the back of the underarm, but I'm trying to suppress my need for everything to fit perfectly when it's not in motion, because arm rotation is pretty important in a t-shirt, and as it stands, there's the perfect amount of ease to move my shoulders and arms around.

I also opted to baste this muslin together the way I'm planning to sew the final garment: shoulder seams first, sleeve set in flat, and side and underarm seams sewn up in one go.  Setting in sleeves in the round is, in my opinion, a total pain in the ass, so I decided to borrow a production trick.

Next up is serging the thing together at the shoulders, figuring out the hem treatment at the neckline, setting in the sleeves and sewing up the side seams, and finishing the bottom and sleeve hems.  Then onto real fabric!

Monday, October 21, 2013

Patternmaking: Basic Tee

IMGP0114 IMGP0116

This morning I was doing a bit of laundry, and as I was folding my clean shirts, I realized that my drawer of basic tees is pretty sad.  I have less than a dozen t-shirts that I wear on a daily basis, and of those dozen, I probably only really like two or three of them.  These are the tees that I grab whenever they're clean, and then have to wait until I do another load of laundry so I can wear them again.  One of them is a shirt I bought at Powell's in Portland about five years ago, and it's looking pretty sad, but it fits so well that I can't bear to part with it.

So instead of wearing it today, I decided to garment duplicate it.  So far, the Garment Duplication series has been one of the most interesting courses I've taken at NYFA.  It's really taught me to look at commercially manufactured garments in a different way, both for appreciating the patternmaking and construction tricks used, and for recognizing the failings and inaccuracies of mass-market clothing.

It's also changed my thinking about the nature of originality and the ethics of copying.  It might seem like cheating to duplicate a favorite garment, but if the manufacturer has changed the process or the design of that garment, or it's very old and no longer produced, it may not be possible to buy that exact one again.  There's a reason we choose favorite t-shirts and sweaters in our closets, and I think it's perfectly reasonable to use those favorites as templates to design or create new things.  It's always easier to start with something pretty good and change it than to start from absolute scratch - it cuts a lot of time and muslins out of the fitting process.  Although I think it's disrespectful to copy an unusual or innovative design wholesale, I think garment duplicating basic items can be a very useful exercise, especially if the designer uses it as a framework to build upon rather than as an end point.

IMGP0118

So, now I'll get back to the plans for my basic tee.  It's pretty typical for t-shirts to be slightly off-grain - the shirt I'm duplicating today definitely is - which isn't the biggest problem ever, but is annoying nonetheless.  I'm hoping that my duplicated version will be just a notch better than the original by fixing little details like this.  I'm also thinking about changing the neckline treatment to a lace edging instead of ribbing; it will dress up the garment a little bit, while keeping it washable and easy to wear.

To start with, I'm creating a pattern map for both the front and back of the garment on a cut-up paper grocery bag.  (What can I say - inspiration struck and I realized I didn't have any butcher paper or sturdier craft paper, so I improvised.)  I have a feeling that I'll have to tweak the pattern once or twice after the initial draft, but I already know that the body fits me really well, so it's likely that the sleeves will cause the most trouble.  I have some warm yellow rayon/lycra jersey in my stash, so I'll probably use that to start with, then move on to a gorgeous nautical-stripe bamboo blend once I get the pattern perfected.

Monday, August 13, 2012

Garment Duplication: Santa Cruz Jacket

First off, I wanted to thank you guys for your comments on my last post.  It's really cool to hear all of your opinions, and I appreciate your taking the time to share them!  I posted a comment in response, which you're welcome to read if you're interested.

But moving on!  What have I been up to in fashion school lately, besides beating my head against my storyboards and black dress patternwork?

Actually, some pretty awesome stuff.  These past three weeks, I've been taking a garment duplication class.  And although the slang term for garment duplication is "knocking off", I've found that there's a lot more to the process than simply copying a design.

IMGP4629 IMGP4639

I have this jacket that I bought at a little shop in Santa Cruz almost six year ago, and it's my go-to cool weather jacket.  I wear it by itself in the fall and spring, and layered over cardigans in the winter.  I love the crap out of this jacket, and I'm fairly sure that I could never find one exactly like it again.  So when I heard about the garment duplication class, I was pretty excited to make a copy of my jacket, because the original is literally falling apart at the seams.

So I brought it in to class, and we started looking at the construction of the jacket.  There are a few interesting things about it: the princess line that shapes the front of the jacket is actually a curved dart; the sleeves are two-piece sleeves, which gives an excellent fit; the seams inside the pockets are unfinished; there's much more shaping on the back than there is on the front.

IMGP4632 IMGP4635

I think perhaps the coolest thing that I learned about it, however, is the way that the pattern pieces were cut on the back.  See, usually center back is cut straight on the lengthwise grain, but in this jacket, it's not:


Apparently this is a pretty common technique used in men's jackets, and it would help explain why I love the fit of this jacket: I have prominent shoulderblades, and the shoulder on the bias allows for easier movement.  I also really appreciated the fact that the fabric is a herringbone, which gives a really clear picture of what the grain is doing.

My eventual plan is to finish patternmaking the jacket as it is, and then grade it up a size.  Although I love the shape, I've often found myself wishing that there was a touch more ease to allow me to wear thicker sweaters underneath, and I think a straight size larger would probably allow for that.

Although there are ethical issues involved in straight-up copying a design, I think there's a lot to be said for duplicating vintage and favorite clothing that can't be replaced - it can provide insight into the kind of fit that works for your body type, the tricks that manufacturers use to put garments together in an efficient way, and the sheer amount of thought and work that goes into producing ready-to-wear clothing.

Thursday, July 26, 2012

Black Dress Fitting

IMGP4492 IMGP4489

What have I been up to at school lately?

About fifty bazillion black dress fittings, that's what.  It's starting to get to the point where I'm fixing little things, like the position of the princess seams at the bust and the shoulder darts.  They aren't so bad right now, but they still need some tweaks to really lie they way they should.  It is pretty awesome, though, to see the transformation of the fit from crappy-sack-with-a-waistband to sweet little black dress.  It's starting to look like the dress I envisioned!

This version has actually been pinned for modifications and is clearly wrinkle-tastic, but I thought it might be cool to share some of my progress.

And you'll have to excuse my scrunchie (which was actually crocheted for me by the host sister!) because I've been cleaning all afternoon.  Tomorrow my mom and I are going to put a deposit down on the wedding venue, so I'm not sure I'll get a post in - if not, hope everybody has a good weekend!

Thursday, December 10, 2009

Stash Appreciation Wednesday: Almost Finals Edition


Mmmmm silky wool. I bought a little more than a regular sweater's worth of this... oh man, probably my freshman year? It was originally intended for an Elsebeth Lavold pattern from one of the pattern support books, but after a while I realized that I wanted to try something a little different. A long jacket with a mandarin collar, frog closures, and some sort of light cable detail on the back (because I really, really love how this yarn looks with both cables and reverse stockinette) and contrasting applied i-cord edgings. I swatched for it, but didn't feel technically proficient enough to design and knit it myself, so this yarn has been sitting in my stash.

Also, I've noticed that both of the garments that I've built from scratch have ended up having applied i-cord. And, actually, both garments that I have yarn for and want to design in the future have applied i-cord edging. There's just something really great about a nice, clean, rolled edge that looks like dressed-up stockinette. Siiigh.

Anyhow. This yarn is strange in some ways; it's listed as a DK, but feels like a sport weight to me. I would hesitate to use it for anything that needs a lot of structure or weight (it's strangely light?), but it has such an interesting texture and an incredible color selection.

And, since it's just about finals time, all I want to do is pet my stash and dream about all the things I'm going to knit when I have a life outside of school. Which, conveniently, will be in about 10 days. I can't wait.

Tuesday, December 1, 2009

anticipation

There's something magical in the act of taking an idea from sketch, to swatch, to reality. Something promising latent in the uncertainty and excitement of learning a new cast-off, or in using an old method in a new way, or in watching what blooms after a good soak in Eucalan and cold water.

Today I did all of the finishing on the Issaquah vest. It's blocking downstairs as we speak. There's waist shaping, two colorwork motifs, applied i-cord edging, a traditional Cowichan bind-off at the shoulder, and a gorgeous, horribly time-consuming garter-stitch shawl collar. I puzzled over PGR's instructions while watching a samurai flick for history class. There's a little pile of yarn bits sitting on my bedside table from the weaving in of ends. My room is a disaster. My last cup of coffee was at 8 pm. I wish the damn vest would dry already so that I could put it on over my Smart-Wool turtleneck and go to chem class and show that while I struggle with crystal structures, I am quite aware of perfect and imperfect symmetry.

In other words, I really can't wait to share this one.

Sunday, November 15, 2009

Work in progress: Cowichan-inspired vest


Not bad for the back, huh? Maybe it's silly, but I sort of like the effect of the stranding... if I learn to do it more regularly I'd think about using it as an accent on the right side of a garment. Hmmmm.

Wednesday, September 9, 2009

She's done.


And hallelujah for that.

Pattern: Her name's Amai. She don't need no stinkin' pattern.
Yarn: Local alpaca, about 600 yards (less than 2 skeins)
Needles: Size 5 US for the lace; size 3 US for twisted ribbing

My first design, called Amai, the Japanese word for sweet. ('Cause I'm a dork like that.)

Now, if I could remember what I did... that would be awesome.

Friday, July 11, 2008

A little orange sweater...

I've been knitting for about three years, and even though I'd like to say that I've been able to rise to every challenge that sticks and string have thrown at me, that's not quite true. I have friends whose first projects were entrelac and lace, and have only moved onto cables, colorwork, and design. I've managed to tackle all but two of those things that I consider on my list of challenging knit techniques. I've done Fair Isle, cables, steeking, lace, socks, and sweaters. But now that I've fallen so completely in love with every single facet of knitting, I feel as though it's time for me to try a little designing.

Ever since I was a little kid, I've loved to combine challenging colors. My mother would send me to preschool some mornings wearing a pink floral skirt, kelly green tights, and a red shirt - and all because I demanded that I dress myself. My dad took to calling me Sneech in my teens, due to the stripy rainbow socks that I wore beneath long, hippie-styled skirts, huge black plaid pants, or even jeans and my ubiquitous gray Oberlin sweatshirt*. I've changed my dress sense a little bit since then, but I still love loud colors as accents. Orange, in particular, is a favorite. I have a puffy, knee-length orange winter coat that I fell in love with in a Lands' End catalog when I was seventeen and bought for the long, snowy winters of Ohio. This coat has been loved to death. Buttons are missing, and the cuffs are gray with dirt. I got the coat in the mail the day that I had to leave Oberlin after two of my friends died in a murder. I wore it on the train, napped in it, and went for late-night grocery runs in it. Girls would stop me in the aisles and tell me what a great color it was. So I have a special fondness for both the coat and the color... and luckily, I happen to have a skein of handspun, hand-dyed baby alpaca in almost the same shade, that I bought at the San Juan County Fair the summer after my senior year of high school. This yarn has stuck around with me for two years, and I think that I've finally found something to do with it.

I think I'm going to keep it simple, with details in the picot trim and ribbon right under the bust. I like the idea of the dark purple ribbon clashing/contrasting with the (ridiculously violent) orange of the sweater. I want the sweater to be fitted, but to have enough ease to fit a button-up shirt or camisole underneath it. I haven't figured out how to attach a picot trim to the neckline of the sweater, or how exactly to plan the math in order to make the ribbing fit my 29-inch ribcage, and, two inches later, my 37-inch bust. I'm thinking that short rows might be in order. But I'm excited to swatch for this project. I really hope that I can finish it before school starts, so that I can show it to my knitting students this fall!

*I've been an Oberlin fan since I was fifteen, after walking around campus in the middle of spring during my sophomore year of high school. I bought a sweatshirt and entertained a dream of actually getting in, but I knew realistically that I had very little chance of getting accepted at such a great school. Happily for me, I was wrong!